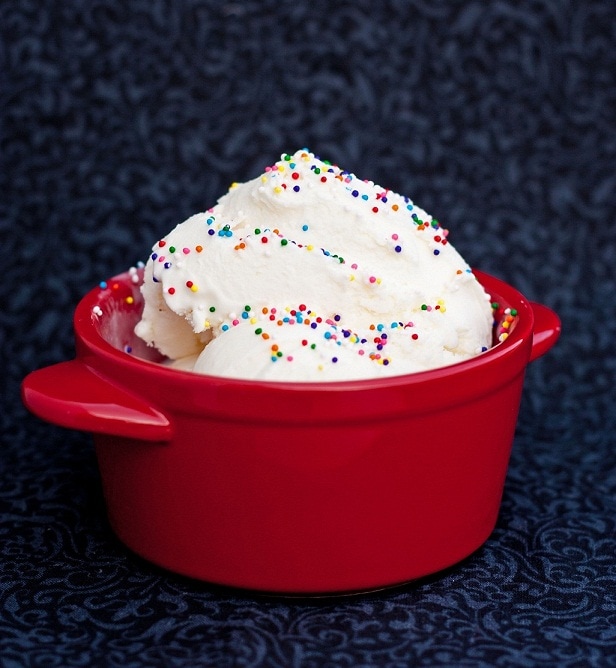
Imagine diving into a scoop of that famously smooth, perfectly sweet ice cream from Cold Stone Creamery, right in the comfort of your own home. What if we told you that iconic Sweet Cream flavor, a staple for any mix-in enthusiast or a divine treat on its own, is remarkably simple to replicate in your kitchen? That's right – you can master the art of making Cold Stone Creamery sweet cream ice cream right at home, transforming ordinary ingredients into an extraordinary dessert.
For many, Cold Stone's Sweet Cream isn't just an ice cream; it's the perfect canvas for culinary creativity, a blank slate awaiting a cascade of delicious mix-ins. It's that rich, pure, and utterly decadent base that elevates any combination from simple to sublime. Whether you crave the crunch of Oreos, the chewiness of brownies, or the tang of fresh raspberries, this versatile base is your ultimate starting point. And the best part? Creating your own copycat version means you can indulge in this "ice cream of the gods" whenever the craving strikes, often healthier, cheaper, and arguably tastier than a trip to the store.
This comprehensive guide will walk you through every step, from selecting your ingredients to perfecting the churn, ensuring your homemade Sweet Cream is a triumph. Get ready to impress your family and friends with a dessert that tastes like it came straight from your favorite creamery.
The Secret Behind the Sweet Cream Sensation
What makes Cold Stone Creamery's Sweet Cream so incredibly special? It's not just vanilla; it's a symphony of dairy and sweetness perfectly balanced to create a luxurious texture and a subtly rich flavor that stands on its own. The commercial version often uses specialized thickeners like guar gum, but our homemade copycat recipe achieves that signature creaminess using readily available household ingredients, primarily cornstarch.
- Dairy Powerhouse: The foundation is a rich blend of heavy cream and whole milk. The high-fat content of heavy cream provides that signature velvety texture and decadent mouthfeel, while milk balances the richness, ensuring the ice cream isn't overly heavy.
- Sweetness and Smoothness: Granulated sugar is, of course, essential for sweetness. However, the addition of corn syrup plays a critical, often underestimated, role. Corn syrup helps prevent the formation of large ice crystals, resulting in a significantly smoother, more scoopable ice cream that resists iciness, even after extended freezing.
- The Unsung Hero – Cornstarch: While commercial operations might opt for guar gum to thicken without heat, cornstarch is our easy-to-find alternative. When heated, cornstarch creates a stable, slightly thickened base that contributes immensely to the ice cream's body and helps maintain its creamy consistency. It's a common pantry item, making this recipe accessible to everyone.
Understanding these core components is the first step to truly mastering your cold stone creamery sweet cream ice cream make it at home project. Each ingredient plays a vital role in achieving that sought-after texture and flavor profile.
Crafting Your Cold Stone Sweet Cream Base: A Step-by-Step Guide
Making this ice cream at home is a process that involves a bit of cooking, chilling, and churning. Follow these steps carefully for the best results.
Gathering Your Ingredients
Before you begin, ensure you have all your ingredients measured and ready. Precision in ice cream making is key!
- 2 cups heavy cream
- 1 cup whole milk
- ¾ cup granulated sugar
- 2 tablespoons corn syrup (light corn syrup works best)
- 1 tablespoon cornstarch
Pro Tip: Using high-quality dairy will significantly impact the final taste and texture of your homemade Sweet Cream. Opt for full-fat options for maximum creaminess.
The Cooking Process: Precision for Perfection
This stage is crucial for activating the cornstarch and dissolving the sugar, creating a smooth, stable base.
- Whisk Dry Ingredients: In a large, heavy-bottomed saucepan, combine the sugar and cornstarch. Whisk them thoroughly until they are well combined. This step prevents the cornstarch from clumping when the liquids are added.
- Introduce Liquids: Pour in the heavy cream, whole milk, and corn syrup. Whisk constantly until the mixture is completely blended and smooth.
- Gentle Heat and Constant Stirring: Place the saucepan over medium heat. This is where patience pays off. Stir the mixture constantly with a whisk or a silicone spatula. The goal is to prevent scorching on the bottom and ensure even heating. You’ll notice the mixture slowly thickening.
- Reaching a Gentle Boil: Continue stirring until the mixture just comes to a gentle boil. This isn't a rolling boil; look for small bubbles forming around the edges and a slight increase in steam. As soon as it reaches this point, reduce the heat immediately.
- Simmer to Thicken: Allow the mixture to gently bubble, still stirring constantly, for exactly 30 seconds. This short simmer is essential for the cornstarch to fully activate and thicken the base properly.
- Strain for Silky Smoothness: Remove the saucepan from the heat. Carefully strain the hot mixture through a fine-mesh sieve into a large, clean bowl. This step removes any tiny lumps from the cornstarch or any potential bits of cooked dairy, ensuring your ice cream base is incredibly silky.
- Preventing a "Skin": Immediately after straining, cover the surface of the ice cream base directly with plastic wrap or wax paper. Press the wrap directly against the surface to prevent a "skin" from forming as it cools. This skin can affect the final texture.
Chilling and Churning: The Key to Creaminess
Proper chilling and churning are non-negotiable for achieving that signature Cold Stone texture.
- Thorough Chilling: Refrigerate the covered ice cream base for at least 4-6 hours, or preferably overnight, until it is fully chilled. This step is critical; a cold base churns faster and produces smaller ice crystals, resulting in a much creamier final product.
- Pre-Churn Freeze (Optional but Recommended): For an even better structure, transfer the extra-chilled mixture to the freezer for 1 to 1.5 hours before churning. This gives the base a head start on freezing, contributing to an even smoother consistency post-ice cream maker.
- Churning in Your Ice Cream Maker: Transfer the pre-chilled base to your ice cream maker and churn according to the manufacturer's directions. This usually takes 20-30 minutes, during which the base will transform into soft-serve consistency.
- Final Freeze (Ripening): Once churned, transfer the soft ice cream to an airtight container. Freeze it for several hours until it reaches your desired firm consistency. This "ripening" stage allows the ice cream to harden completely and develop its full texture. If it becomes too firm, a quick 5-10 second soften in the microwave can bring it back to perfect scoopability.
Beyond the Base: Elevating Your Homemade Creation with Mix-Ins
Now that you've mastered how to make cold stone creamery sweet cream ice cream at home, it's time for the fun part: the mix-ins! Cold Stone is famous for its "creations," where ingredients are folded into the ice cream on a frozen marble slab. You can replicate this experience at home, or simply incorporate them in a more convenient way.
Cold Stone Style at Home:
If you want the full Cold Stone experience, freeze a large marble slab, baking sheet, or even a ceramic tile for several hours until it's very cold. Scoop your freshly churned ice cream onto the cold surface, add your desired mix-ins, and use two large spoons or spatulas to fold and chop the ingredients into the ice cream until evenly distributed. This method keeps the ice cream cold and prevents it from melting too quickly as you mix.
Simpler Mix-In Methods:
- During Churning: For a less messy approach, add your mix-ins during the last 5 minutes of processing in your ice cream maker. The machine will gently incorporate them.
- Layering in the Container: As you transfer the soft-serve ice cream to its final freezing container, alternate layers of ice cream with layers of your chosen mix-ins. Use a knife to swirl them gently.
Popular Mix-In Ideas:
The beauty of Sweet Cream is its versatility. My personal favorites include crushed Oreos, chewy brownie chunks, or a combination of raspberries and graham cracker pieces. But don't stop there!
- Chocolaty Delights: Chocolate chips (milk, dark, or white), M&Ms, chopped candy bars (Twix, Reese's), hot fudge swirls.
- Fruity Freshness: Fresh berries, diced peaches, mango chunks, raspberry swirls.
- Crunch & Texture: Crushed cookies, granola, chopped nuts, pretzel bits, pie crust pieces.
- Sweet & Decadent: Caramel sauce, mini marshmallows, sprinkles, chopped brownies, cookie dough bits.
Don't be afraid to experiment! The pure flavor of the Sweet Cream base makes it the perfect complement to almost anything you can imagine.
Troubleshooting and Expert Tips for Perfect Sweet Cream Every Time
Even with the best instructions, a few common issues can arise when you make cold stone creamery sweet cream ice cream at home. Here’s how to avoid them and get the perfect scoop.
- "Why is my ice cream icy?" This is usually due to insufficient chilling of the base, not enough corn syrup (which acts as an anti-crystallizer), or too much air incorporated during churning. Ensure your base is *extremely* cold before churning, and don't over-churn.
- "My base didn't thicken." This often happens if the mixture didn't reach a gentle boil or wasn't allowed to simmer for the full 30 seconds, preventing the cornstarch from activating.
- "It's too hard to scoop!" Ensure you've used corn syrup, as it's crucial for preventing excessive hardness. If it's rock solid, let it sit on the counter for 5-10 minutes, or use the microwave trick (5-10 seconds).
- Storage Matters: Always store your homemade ice cream in an airtight container to prevent freezer burn and keep it fresh for up to 2 weeks (though it rarely lasts that long!). Press a piece of plastic wrap directly onto the surface before sealing the lid for extra protection.
- Serving Temperature: For the best flavor and texture, let your ice cream soften slightly at room temperature for 5-10 minutes before scooping and serving.
By paying attention to these details, you'll consistently produce a homemade Sweet Cream ice cream that rivals its professional counterpart.
There's an undeniable satisfaction in recreating a beloved treat from scratch, especially one as universally adored as Cold Stone Creamery's Sweet Cream ice cream. By following this comprehensive guide, you now possess all the knowledge and tips needed to confidently make cold stone creamery sweet cream ice cream at home. From understanding the role of each ingredient to mastering the subtle nuances of cooking and churning, you're well-equipped to transform your kitchen into a personal creamery. So go ahead, grab your ingredients, fire up your ice cream maker, and prepare to delight in a dessert that is not only cheaper and potentially healthier but also imbued with the extra special ingredient of homemade love. Enjoy every silky, sweet scoop!
